Christmas Ribbon Bow Tutorial 2024: Create Stunning Bows For Your Festive Decor
Christmas Ribbon Bow Tutorial 2024: Create Stunning Bows for Your Festive Decor
Related Articles: Christmas Ribbon Bow Tutorial 2024: Create Stunning Bows for Your Festive Decor
- Christmas Recipes Around The World 2024
- Christmas Recipes Meat 2024: Festive Delights For A Memorable Celebration
- Christmas Recipes: Salads To Delight In 2024
- Christmas Quotes For Sister 2024: Heartwarming And Sentimental Messages
- Christmas Quotes During Hard Times 2024
Introduction
In this auspicious occasion, we are delighted to delve into the intriguing topic related to Christmas Ribbon Bow Tutorial 2024: Create Stunning Bows for Your Festive Decor. Let’s weave interesting information and offer fresh perspectives to the readers.
Table of Content
Video about Christmas Ribbon Bow Tutorial 2024: Create Stunning Bows for Your Festive Decor
Christmas Ribbon Bow Tutorial 2024: Create Stunning Bows for Your Festive Decor

With the holiday season fast approaching, it’s time to start thinking about festive decorations. And what could be more iconic than a beautiful Christmas ribbon bow? In this comprehensive tutorial, we’ll guide you through the step-by-step process of creating your own stunning Christmas ribbon bows, perfect for adding a touch of holiday cheer to your home, gifts, and festive attire.
Materials You’ll Need:
- Ribbon in your desired colors and widths
- Scissors
- Ruler or measuring tape
- Pencil or fabric marker
- Hot glue gun and glue sticks
- Optional: embellishments such as beads, sequins, or bells
Step 1: Choose Your Ribbon
The first step is to select the right ribbon for your bows. Consider the colors and patterns that will complement your holiday decor. You can choose traditional red, green, and gold ribbons or opt for more modern and unique color combinations. The width of the ribbon will also affect the size and shape of your bows.
Step 2: Determine the Size of Your Bows
Before you start cutting the ribbon, it’s important to determine the size of the bows you want to make. Use a ruler or measuring tape to mark the desired length of the ribbon for each loop of the bow. The length of the loops will determine the overall size of the bow.
Step 3: Cut the Ribbon
Once you have determined the size of your bows, cut the ribbon into the necessary lengths. For a classic bow with two loops, you will need four pieces of ribbon: two for the loops and two for the tails.
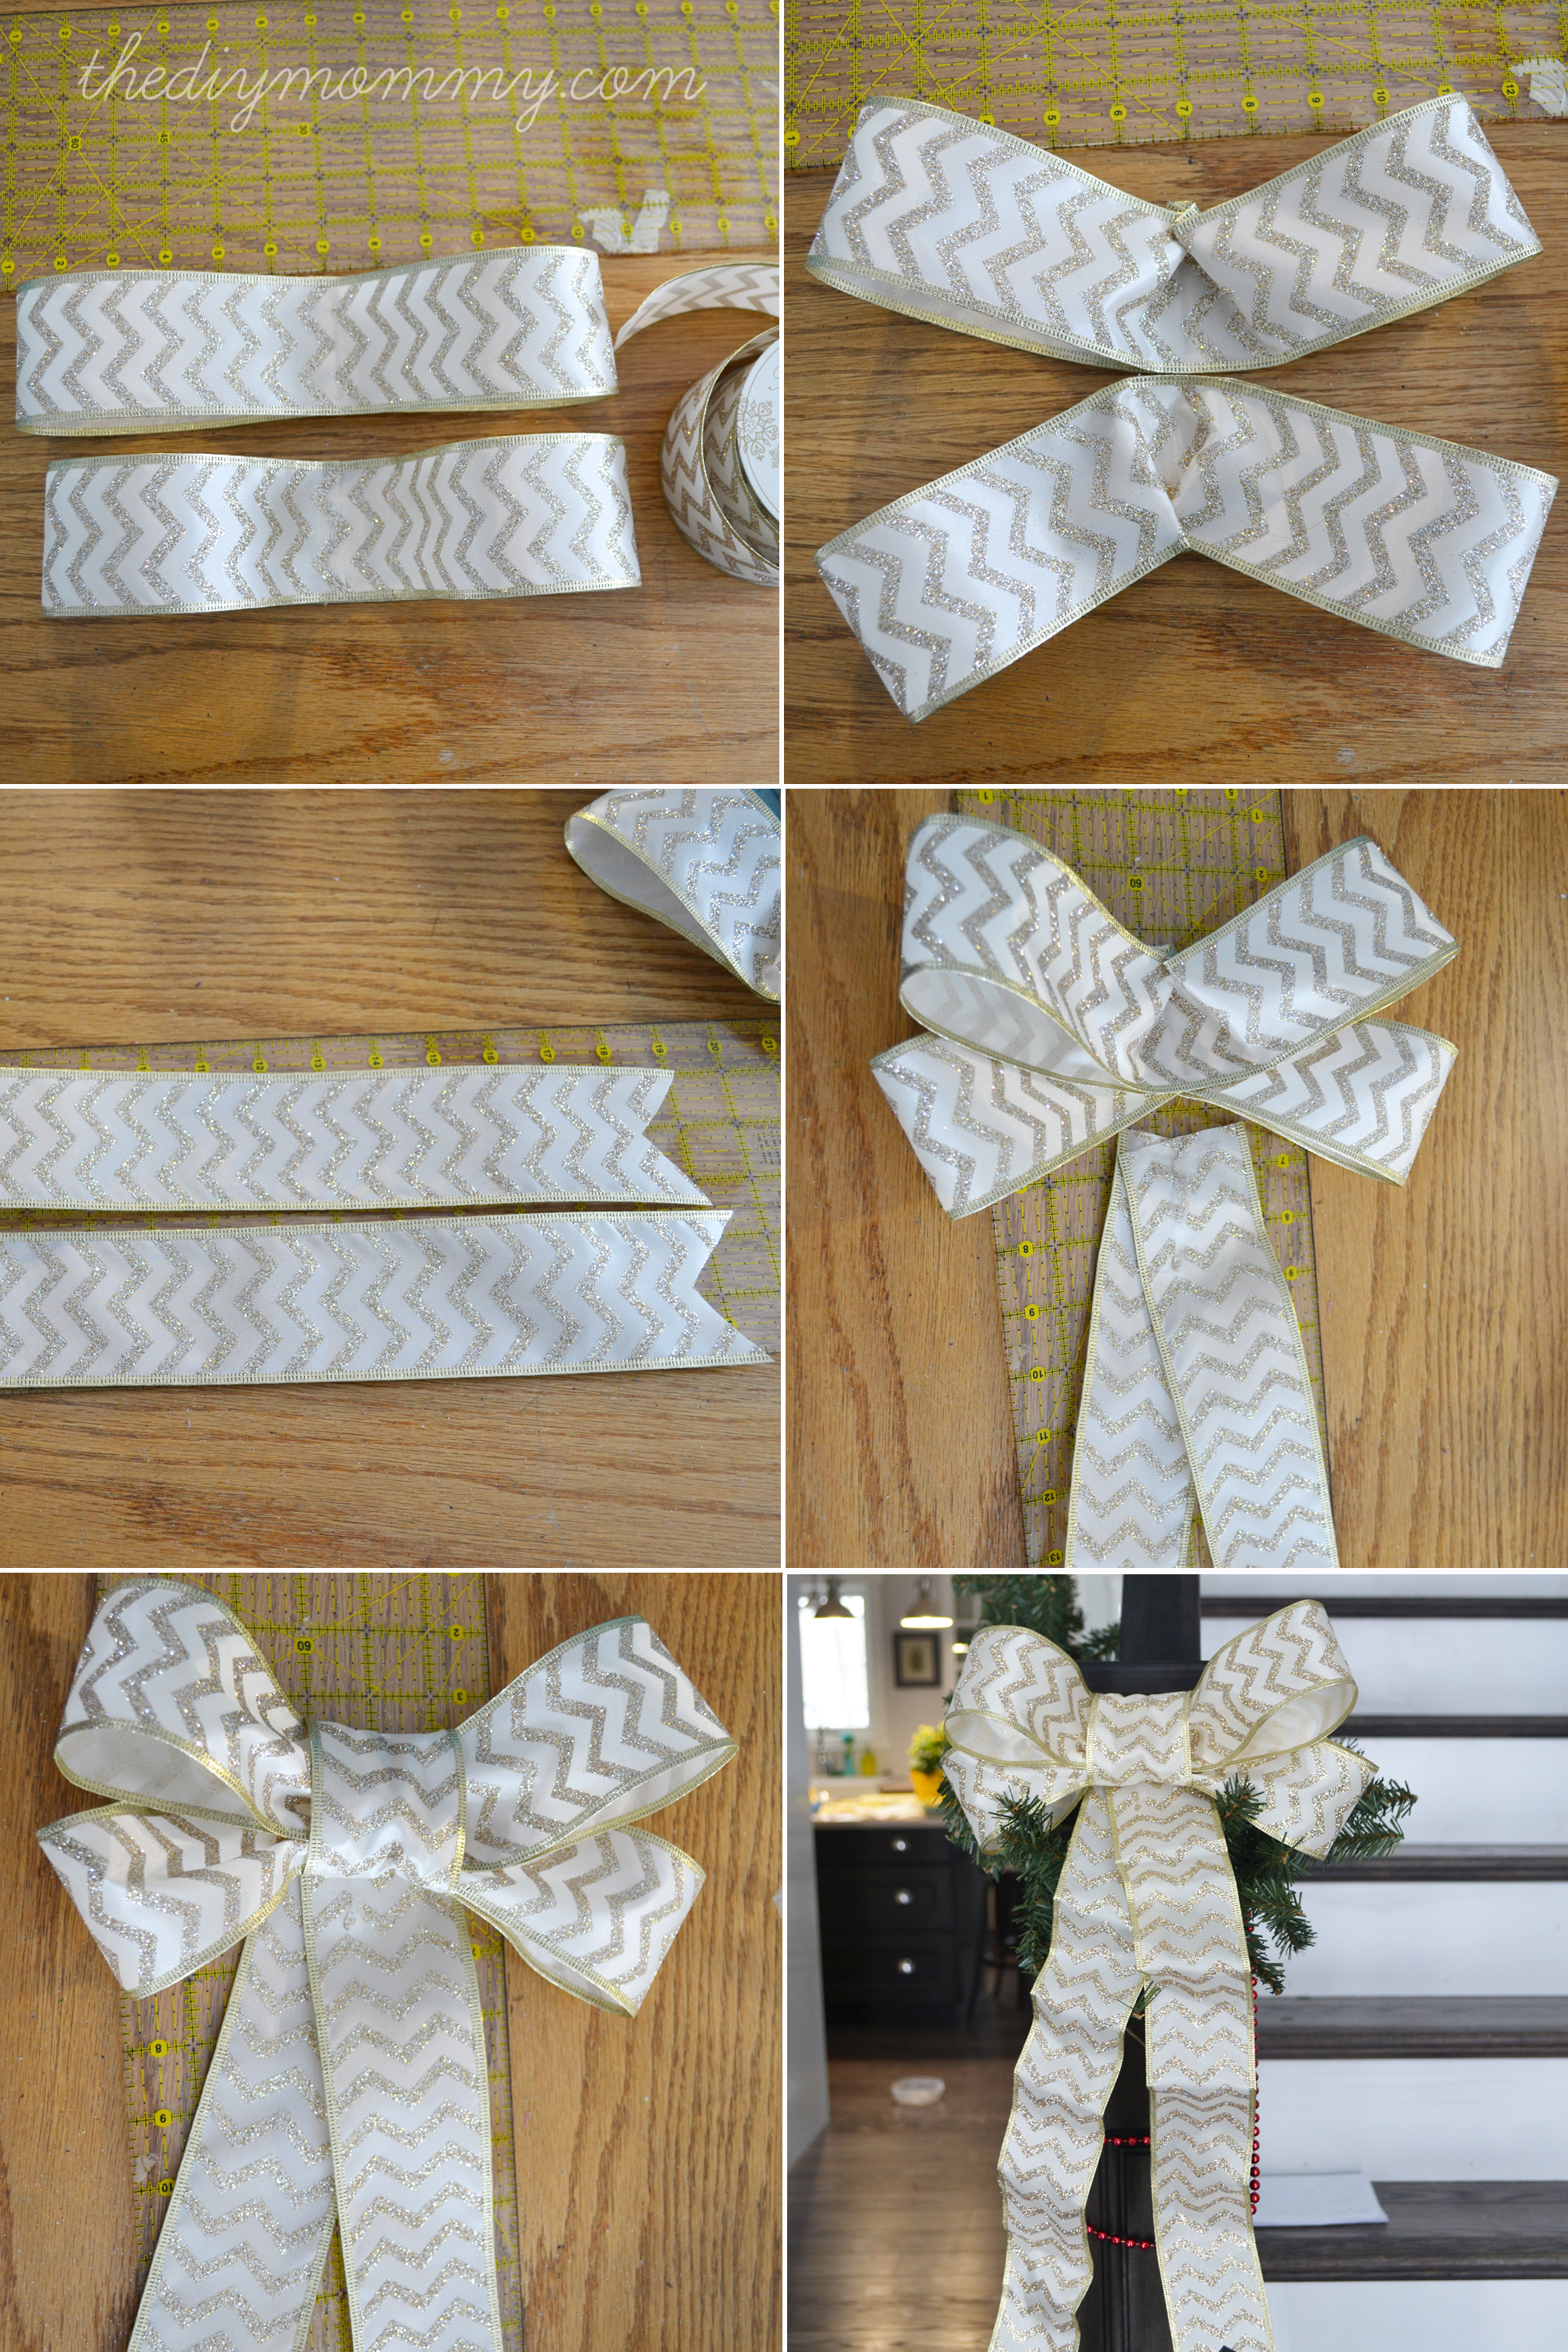
Step 4: Fold and Glue the Loops
Take one of the ribbon pieces for the loops and fold it in half lengthwise, bringing the edges together. Press the edges together to create a crease. Unfold the ribbon and apply a line of hot glue along the crease. Fold the ribbon back over and press the edges together, sealing the loop. Repeat this process with the other ribbon piece for the loop.
Step 5: Create the Tails
Take one of the ribbon pieces for the tails and fold it in half lengthwise, bringing the edges together. Press the edges together to create a crease. Unfold the ribbon and apply a line of hot glue along the crease. Fold the ribbon back over and press the edges together, sealing the tail. Repeat this process with the other ribbon piece for the tail.
Step 6: Assemble the Bow
To assemble the bow, place the two loops side by side, with the folded edges facing each other. Apply a line of hot glue to the center of the loops and press them together. Next, take one of the tails and place it over the center of the loops, with the folded edge facing down. Apply a line of hot glue to the back of the tail and press it down, securing it to the loops. Repeat this process with the other tail.
Step 7: Finish and Embellish
Your basic Christmas ribbon bow is now complete! To give it a more festive touch, you can add embellishments such as beads, sequins, or bells. Simply glue the embellishments onto the center of the bow or the tails, as desired.
Tips for Creating Perfect Bows:
- Use sharp scissors to cut the ribbon cleanly.
- Measure the ribbon carefully to ensure the loops and tails are the same size.
- Apply the hot glue sparingly to avoid creating a mess.
- Press the ribbon firmly when gluing to create a strong bond.
- If you want to create a larger bow, simply use wider ribbon or add more loops.
- Experiment with different ribbon colors and patterns to create unique and eye-catching bows.
Conclusion:
With these step-by-step instructions, you can easily create beautiful Christmas ribbon bows to add a touch of festive cheer to your holiday decor. Whether you’re decorating your tree, wrapping gifts, or adding a touch of elegance to your festive attire, these bows are sure to impress. So gather your materials, let your creativity flow, and enjoy the process of making your own stunning Christmas ribbon bows.


Closure
Thus, we hope this article has provided valuable insights into Christmas Ribbon Bow Tutorial 2024: Create Stunning Bows for Your Festive Decor. We thank you for taking the time to read this article. See you in our next article!